

Monochrome Stocking Full of Joy
Affiliate links: You support my crafty business whenever you click on a link and buy something, and it doesn’t cost you a penny extra.
The main feature of this card is a Christmas stocking die set called Stocking Full of Joy. It was the Large Die of the Month for July this year. Being a member of Spellbinders Large Die of the Month Club is a great way of building up your stash of dies. A membership also makes a great gift for the holidays.
This die set is great to use with scraps, because there are lots of small dies that combine to create characters and greenery. However I used Recollections 110 lbs cardstock in Garden Greens. It’s a nice weight for die cutting and contains 4 different shades of green. That makes it perfect for a largely monochromatic card. To complement it, I used Recollections green foiled cardstock.


Start by die cutting all the parts in the cut list.
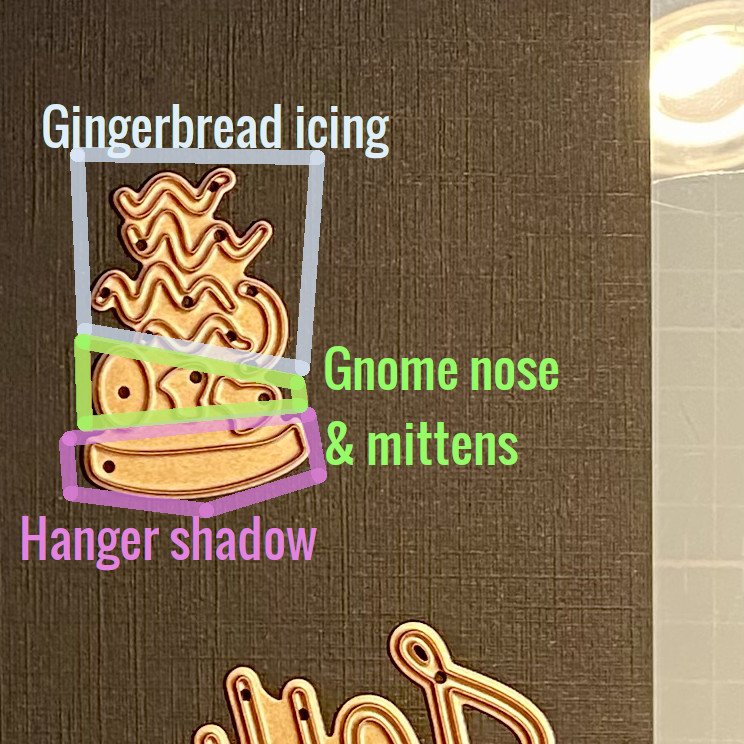
Stocking
Adhere the cuff, heel and toe to the front of the stocking. Align the heel and toe to the outside edge of the stocking. They don’t reach the faux stitching.
Add the hanger to the backside. I didn’t use the shadow in the hanger, because it’s mostly covered by a gnome.
Gnomes
Color the noses pink. Glue them to the beards. Then slide the beards into the slits in the hats and glue them together. The beard covers the back of the hat.
Cut list
Stocking in dark green and white, stack
Stocking toe, heel and cuff in green foil
Gnomes * 2 in different shades
Beards * 2 in white
Noses * 2 in white, color them pink
Candy cane * 2 in white
Candy cane bits *2 in green shades
Greenery
Holly leaves * 2 or more in 2nd darkest green
Holly sprigs with berries* 4 or more in 3rd green
Mistletoe sprigs * 2 or more in lightest green
Sentiment
Word in green foil and white, stack
Shadow in 2nd darkest green and white, stack
Decide if you want the arms to match the hats, or to contrast with them. Glue one set of arms raised behind one beard, and the other set pointing down behind the other beard.
Candy canes
Starting from the curved part, glue the colored die cuts to the candy cane bases.
Stocking assembly
Use the beards to adhere one gnome to the top right of the stocking cuff, and the other to the top left. It should look as if the gnomes are hanging out of the top of the stocking.
Then glue your candy canes together and check their placement behind the stocking against your cardbase. The first time I made this card, I placed my candy canes too high up. I had to peel them off and place them lower, or they wouldn’t have fit in the envelope.
When you’re satisfied, glue the candy canes to the back of the stocking between the gnomes. Then you can place foam tape along the center on the back of the decorated stocking. Don’t remove the release paper just yet, though.
Sentiments
The sentiment is from Spellbinders Outlined Christmas Sentiments. It was the Small Die of the Month in October of last year. I think the font is charming. There’s a matching set with non-holiday sentiments too. It’s on sale for only $5 right now.
Cut the word out of foil cardstock and white cardstock and stack them for dimension and stability.
Cut the shadow layer out of a medium - light green, as well as white cardstock. Stack the die cuts for dimension and stability.
Add the word to the shadow layer. Then add the sentiment to the stocking, matching the angle of the sole.


Background
I created the background with the Sweater Weather Embossing folder, also from Spellbinders. It’s a 2D folder, so it has a great price point. I used the second darkest shade from the Garden Greens cardstock pack.
After the dry embossing, I ink blended the center with Uncharted Mariner Distress Oxide Ink. That creates depth and helps lift up the foliage from the background.
I cut down my background to 4” by 5.25”. For stability and dimension I cut a 3.75” by 5” piece of Accent Opaque 120 lbs and glued it to the back of the background.
Foliage
On the individual holly leaves, I ink blended the bottom center with Uncharted Mariner. Then I placed thin strips of foam tape under the top leaves of 4-5 of my holly and mistletoe sprigs.
To guide my composition, I held the decorated stocking in place with magnets. I started by placing a sprig in each corner. Then I filled in between those with more sprigs and leaves.
Both the holly and the mistletoe sprig die cuts have circles for berries. My “berries” are silver flatback pearls. Unfortunately they’re sold out. But here’s an alternative on Amazon.
Finally I adhered the stocking with foam tape and added more embellishments around it. Then I glued my card front to a card base.
Links
Spellbinders Stocking Full of Joy: https://shrsl.com/4atnc
Outlined Christmas Sentiments: https://shrsl.com/4atnd
Sweater Weather Embossing Folder: https://shrsl.com/4atnj
Uncharted Mariner Distress Oxide: https://amzn.to/46qoqYV
Salvaged Patina Distress Oxide: https://amzn.to/3swpmNk
Silver flatback pearls: https://amzn.to/3MA5uQk
Color Club Over the Moon Nail Polish: https://amzn.to/3QQFhzj
