

Chrysanthemum sympathy cards

Sympathy card with washi tape flowers
Affiliate links: You support my business whenever you click on a link and buy something, and it doesn’t cost you a penny extra.
Chrysanthemum
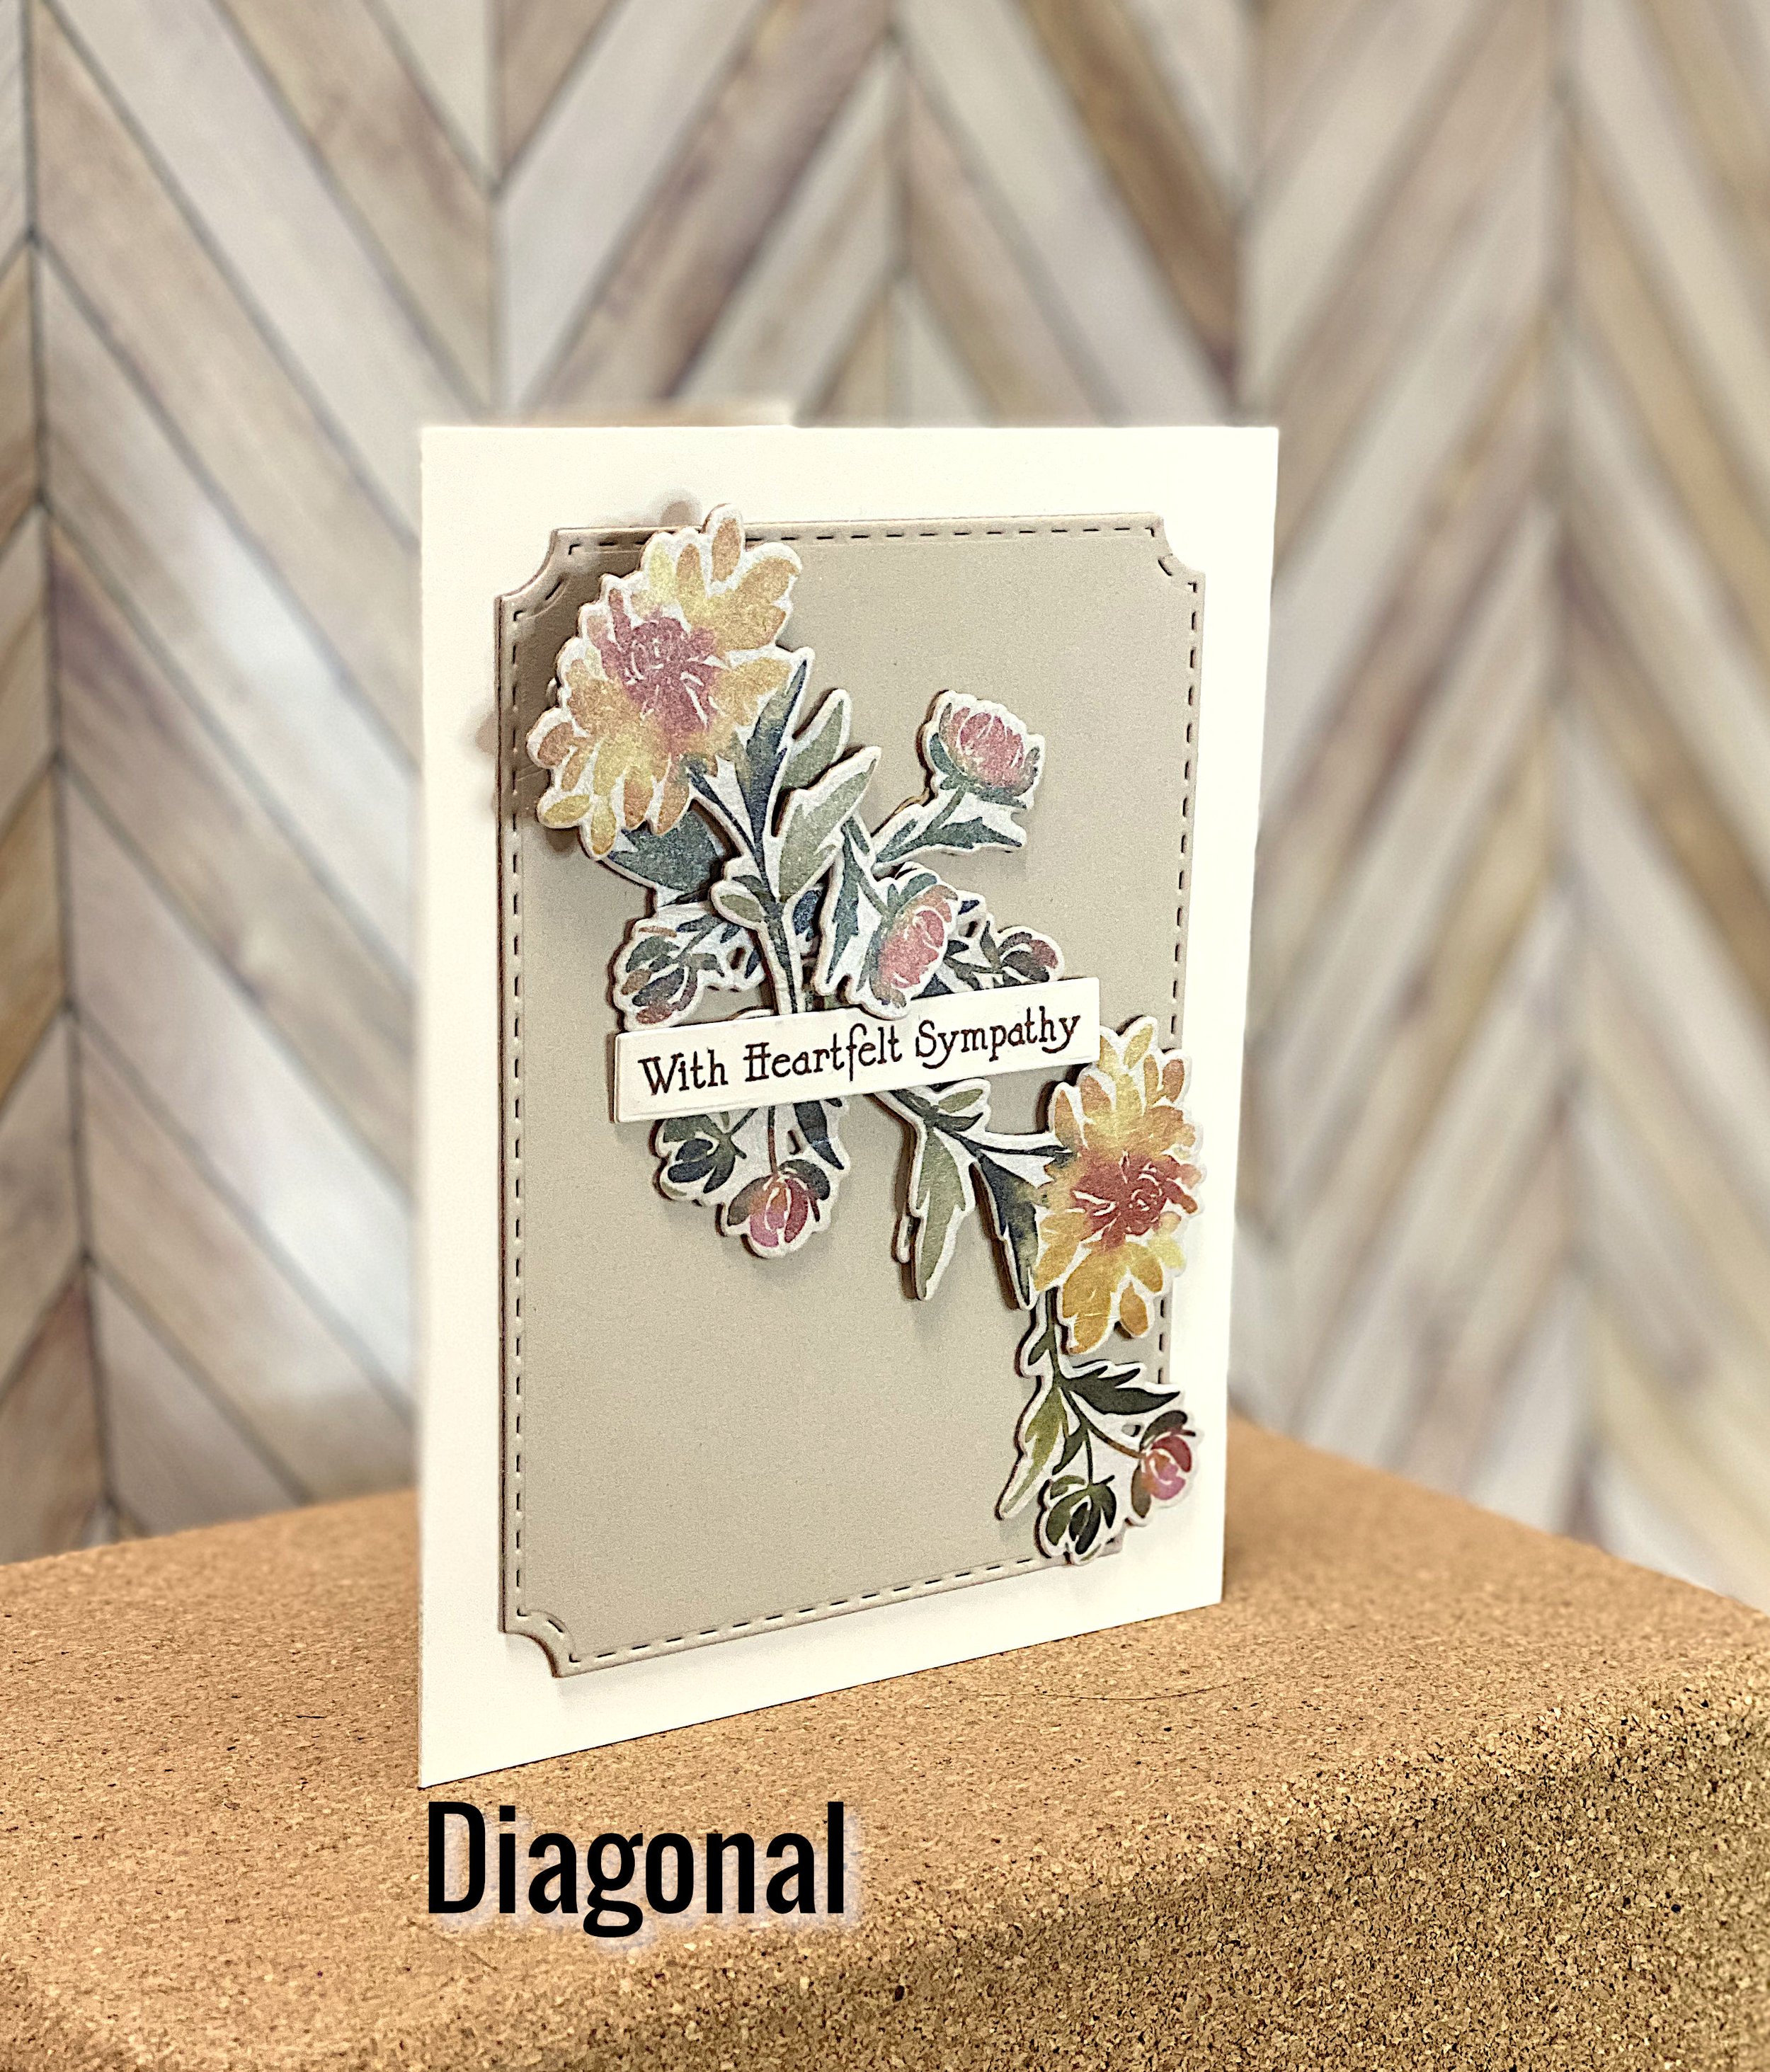
The main focus of these cards are flowers from Pinkfresh Studio’s Chrysanthemum collection. I applied the washi tape to tan cardstock to tone down the vibrant colors. Then I cut out the flowers with the coordinating die. As usual, I also cut a second layer and glued it to the back, for a more substantial impression.
As an aside, there are also a stamp set and layering stencils, plus a whole host of other coordinating products. As far as I know Pinkfresh are the only company that do washi tape with coordinating dies. It makes it very quick and easy to create decorative focal points for both cards and scrapbook pages and their designs are beautiful.
If you have the means, Pinkfresh’s cardmaking and scrapbooking events are fantastic. The wonderful products used in the classes are included in the price. In fact I got the Chrysanthemum washi and die set at last year’s scrapbooking event.
Panels
I wanted these cards to have a layered look, so I cut out double panels of the same tan cardstock. The die set I used is from Pink & Main. I got mine on Amazon, but I only see cheap knock-offs there now. I added the panels to the front of the card bases.
That’s when I realized that these cream card bases are not quite as sturdy as the white and Kraft card bases I use. As Jennifer McGuire likes to say “Nobody likes a floppy card.” The double front panel helps but I also added a panel to the inside of the card for added stability.
So far I haven’t found a ready-made cream card base that I really like. If you have any tips, please send them to me. For now, I’ll make my own.
Sentiment
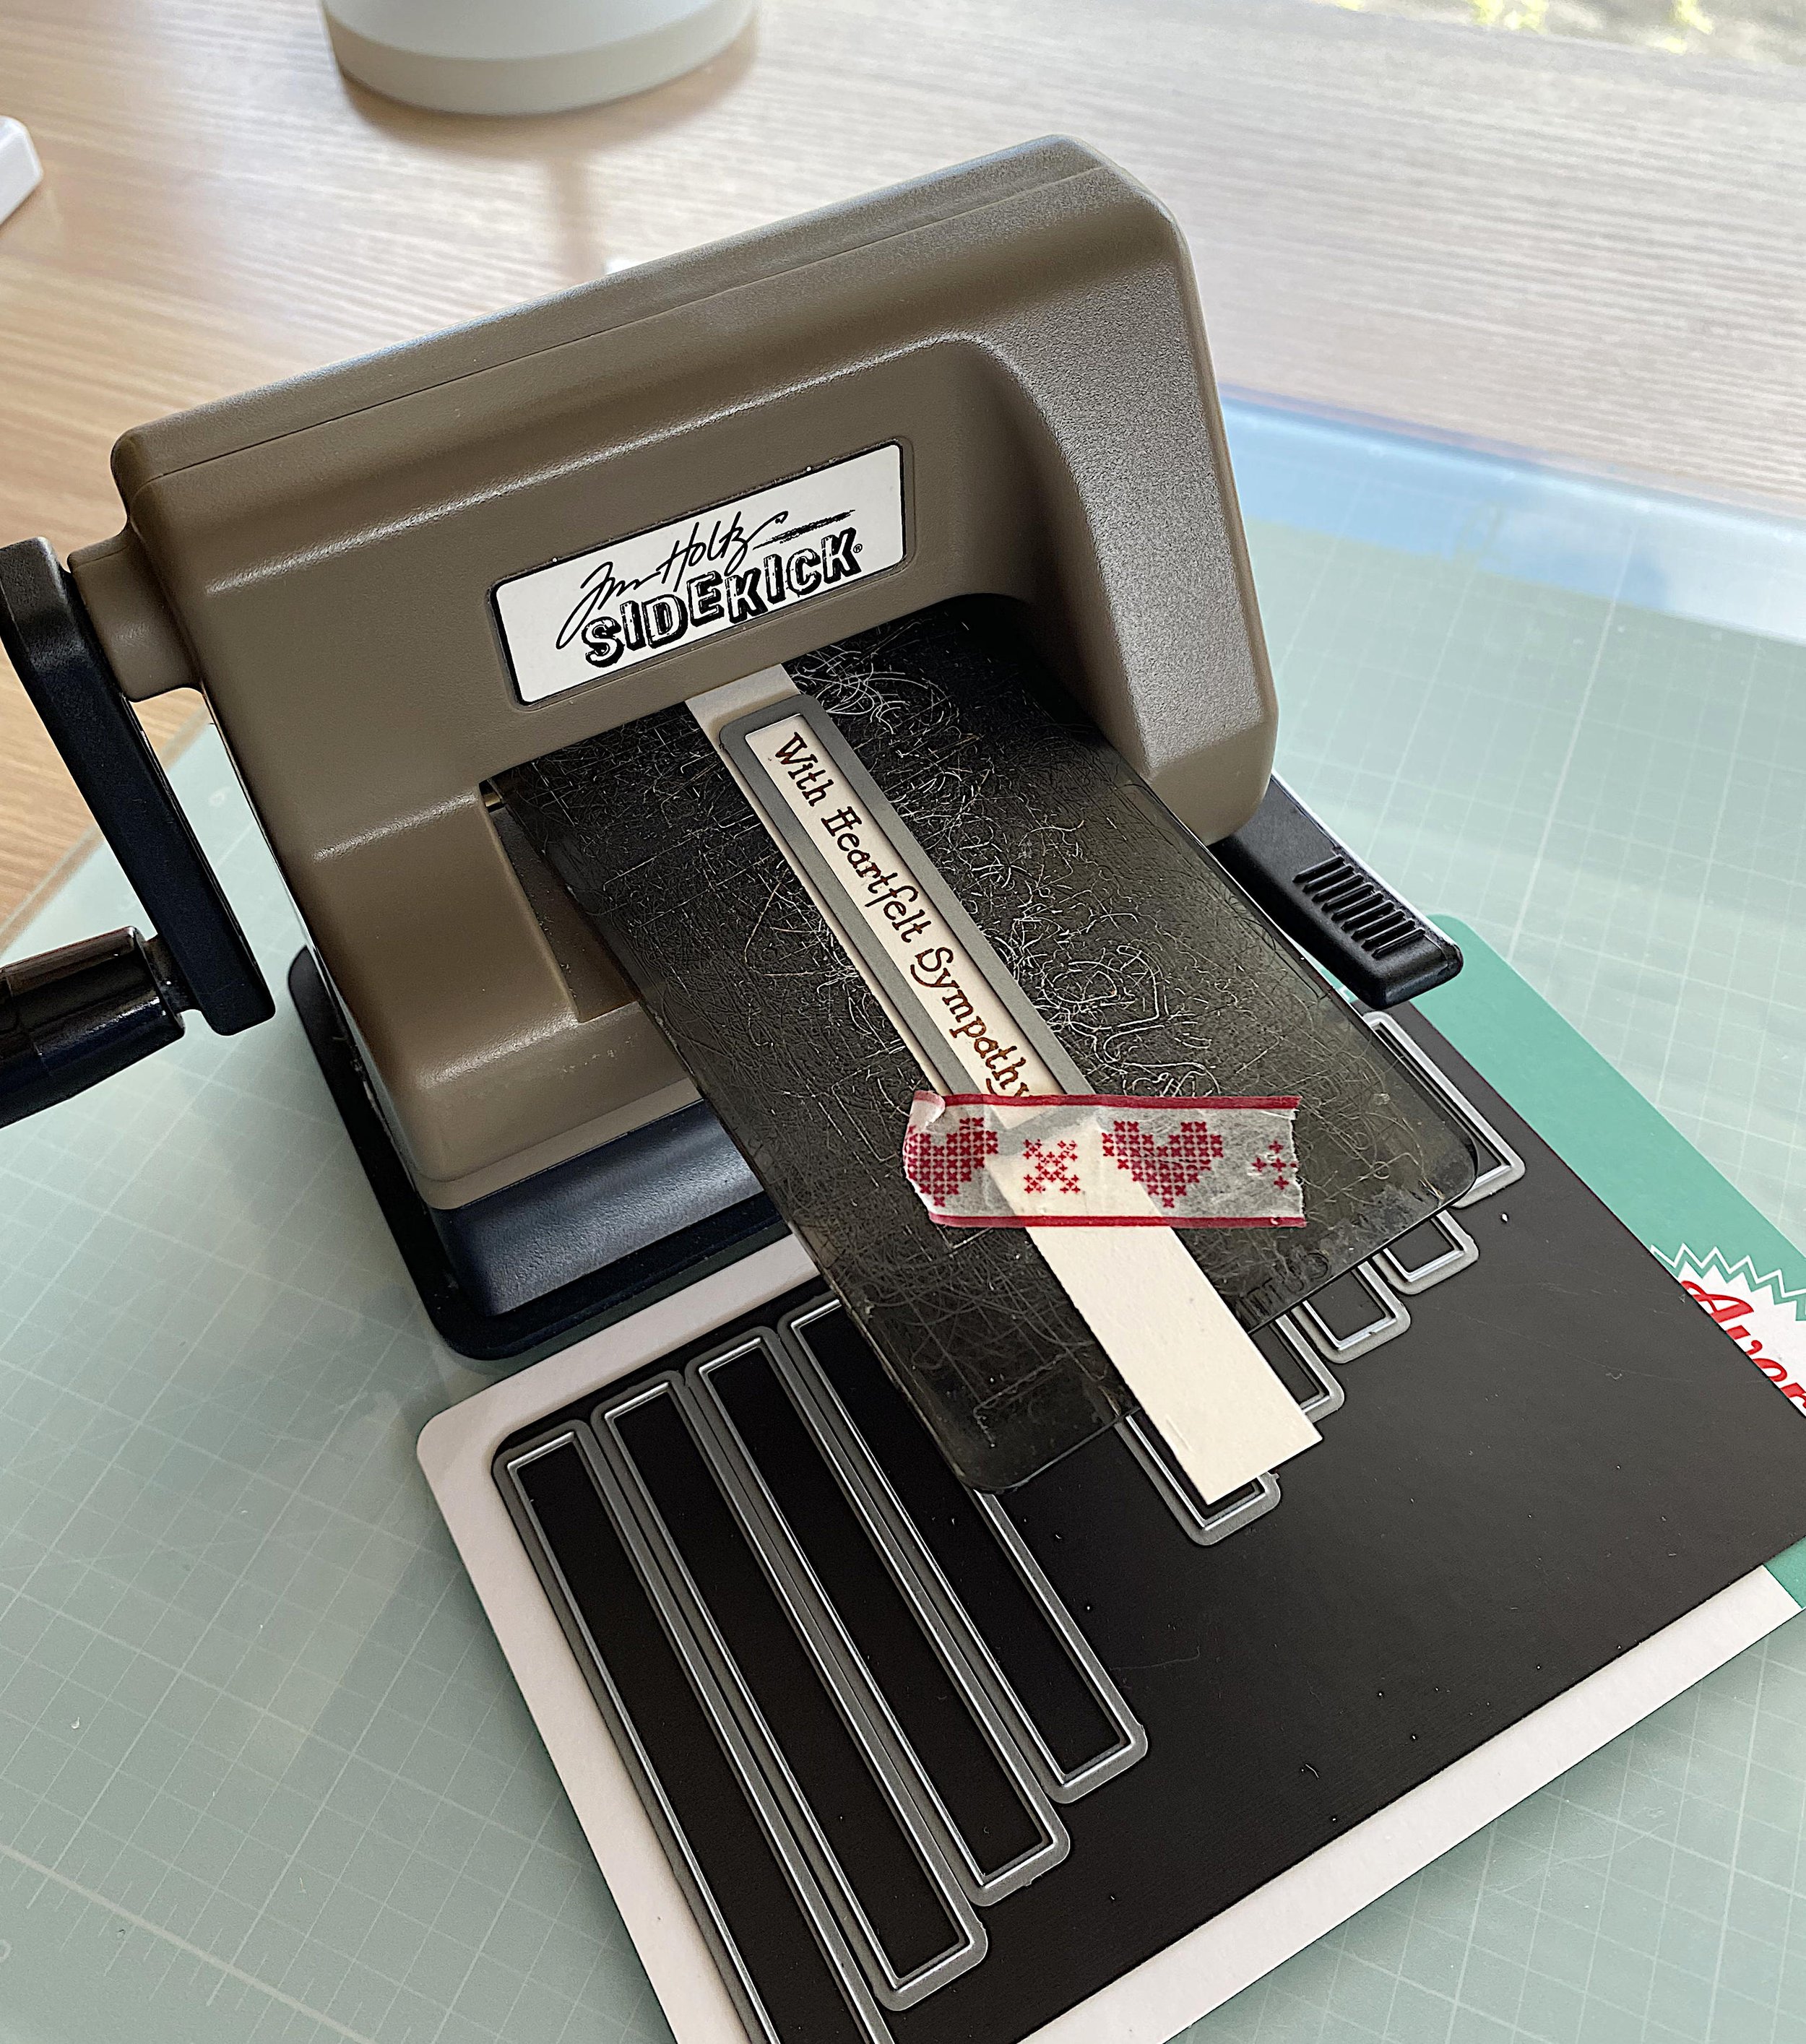
For the sentiment I used a stamp from a Photoplay stamp set. The set was probably an exclusive for an event, because I can’t find it anywhere online. I cut the greeting out using a sentiment strip die set from Avery Elle. Unfortunately they’ve been discontinued. Here’s a set of sentiment strip banners from Lawn Fawn that’s a good starting point if you don’t already have this foundational die set.
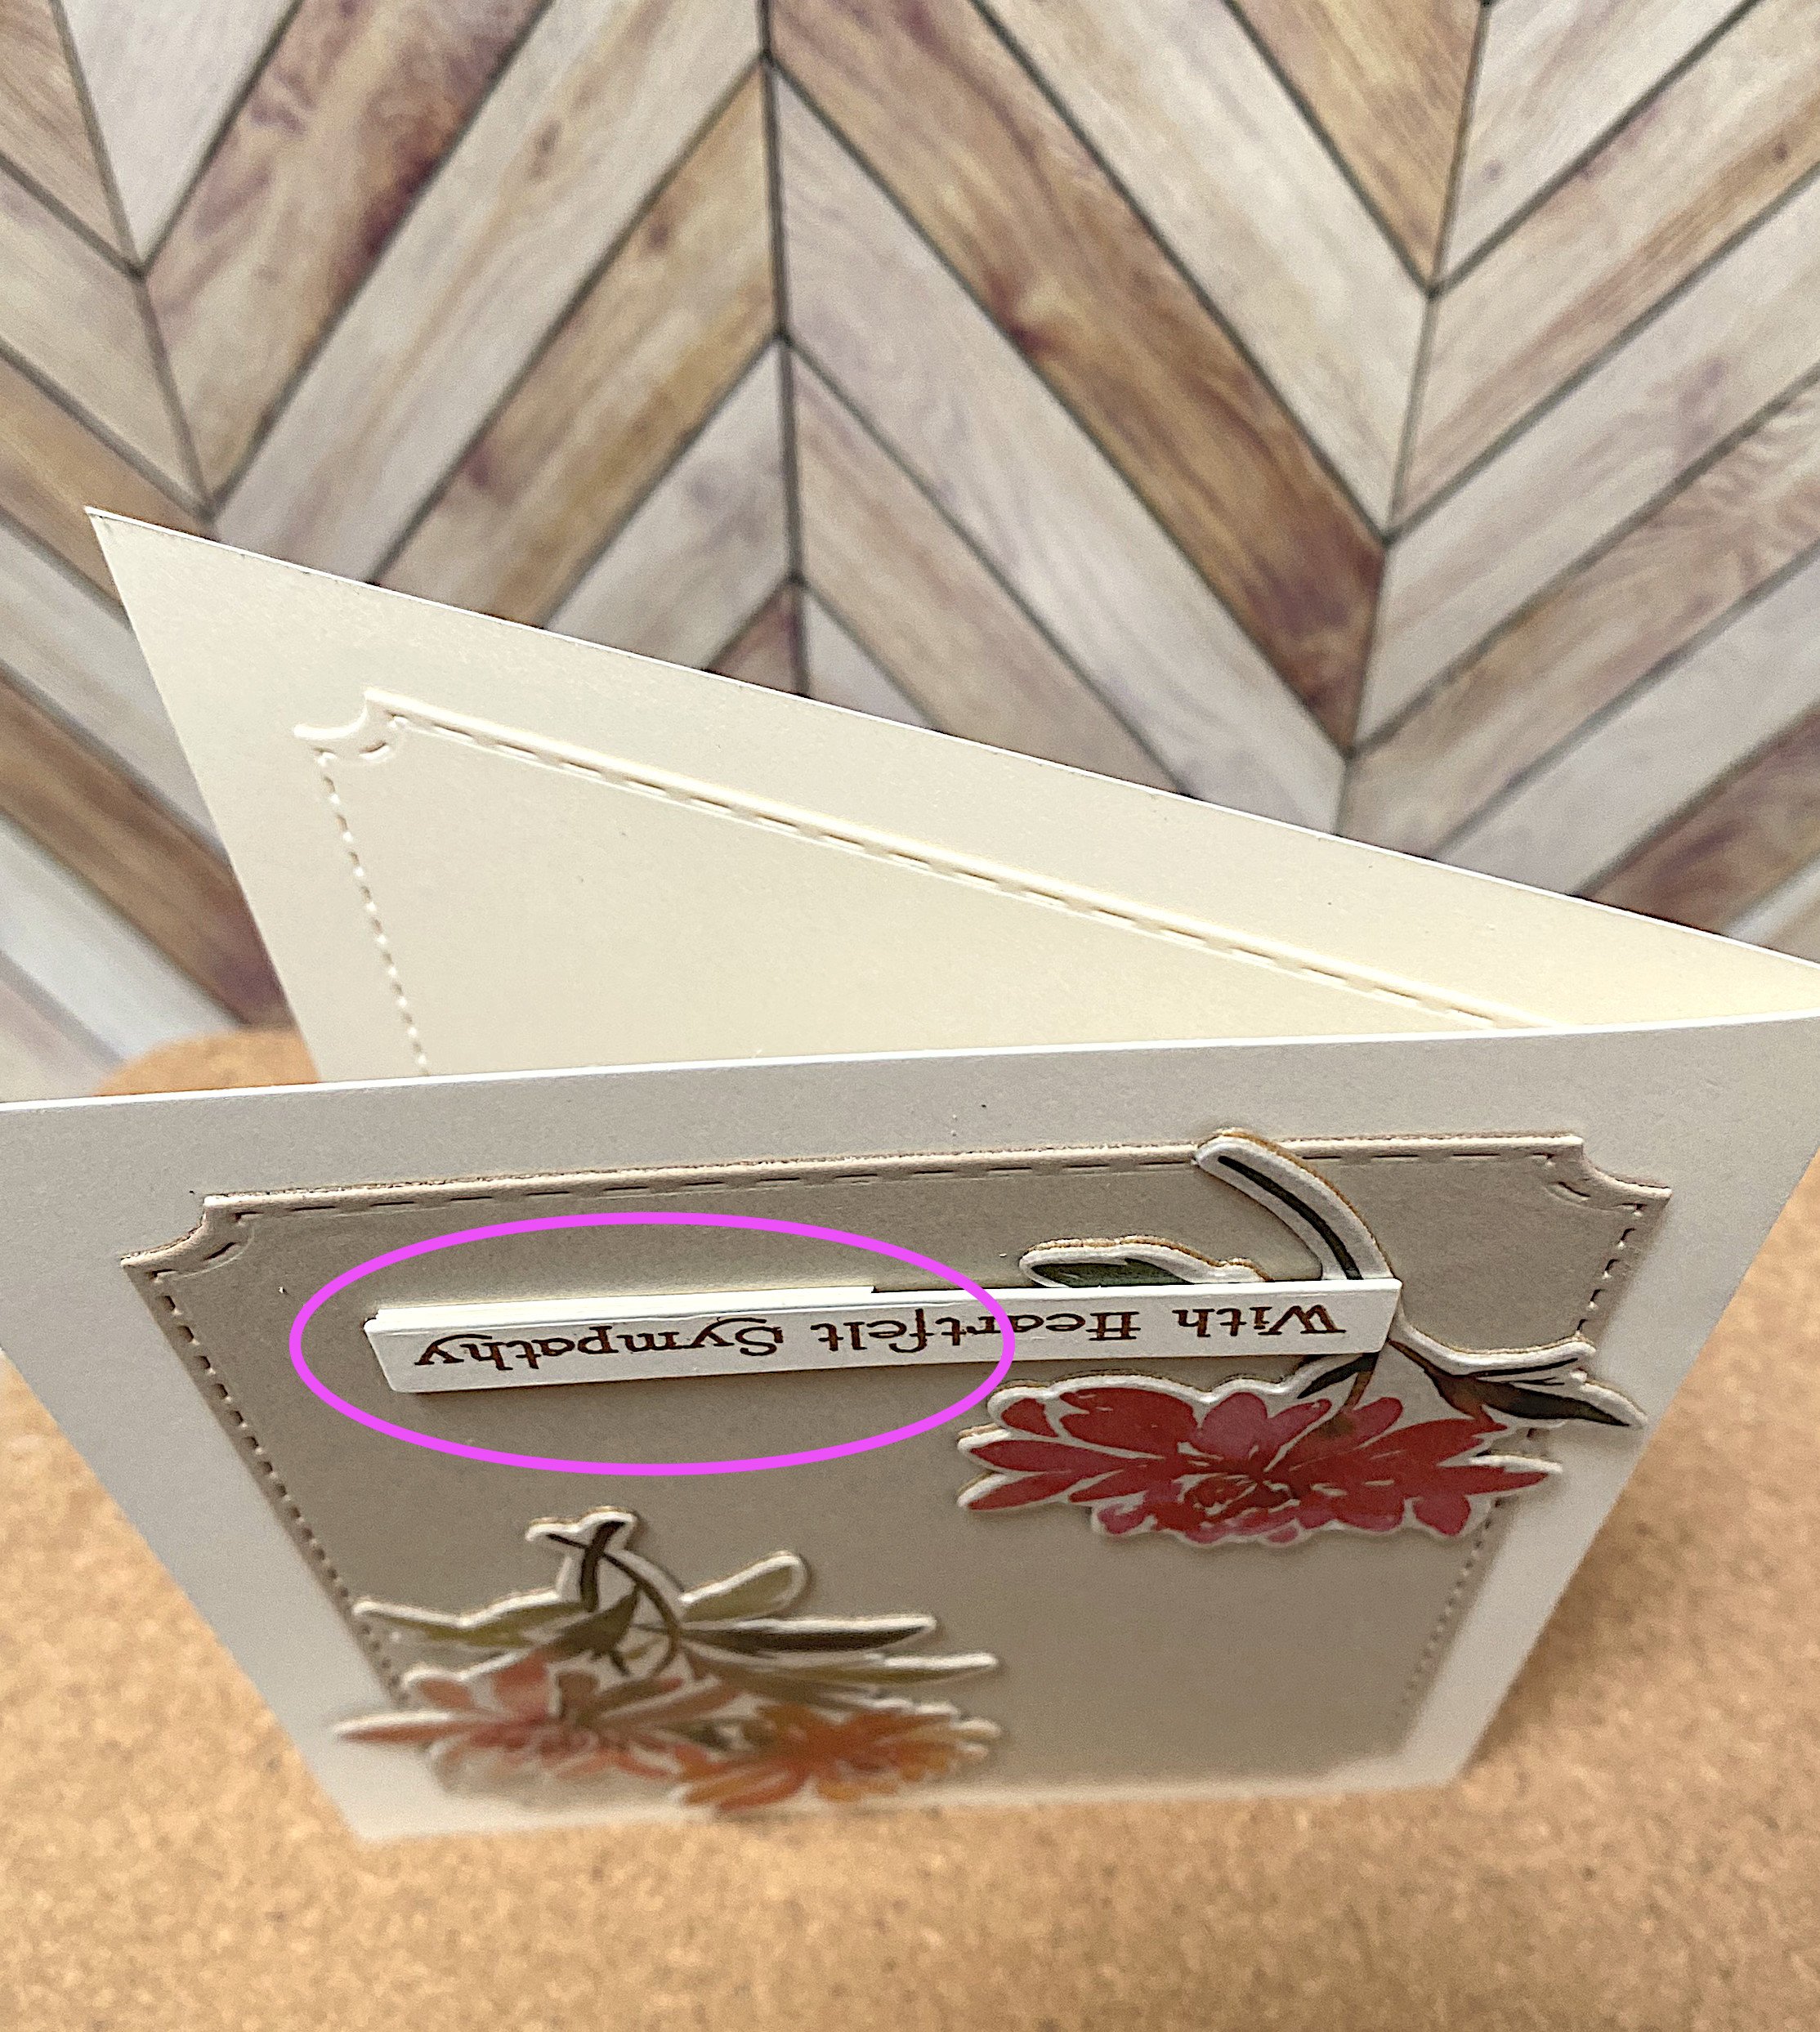
Controlling the topography of your card is something that sets the advanced cardmaker apart from the beginner. This is particularly obvious with sentiments. If you lay the card flat on a table and place a level on the sentiment, the bubble should rest in the middle. In all these cards, I placed the sentiment strips partly on top of a flower element. That meant building up the part that wasn’t supported by the flower to the same level. If you look really closely, you’ll notice that there are extra cardstock strips under part of the sentiment. You can also use foam tape.
It’s hard to find sympathy stamps and die sets that feel authentic. Pinkfresh have a set that I will likely buy next time I have a promo code. I particularly like that it includes sentiments for Jewish and Pagan people. Here’s another nice set with a variety of sentiments that go beyond the clichés by Penny Black.
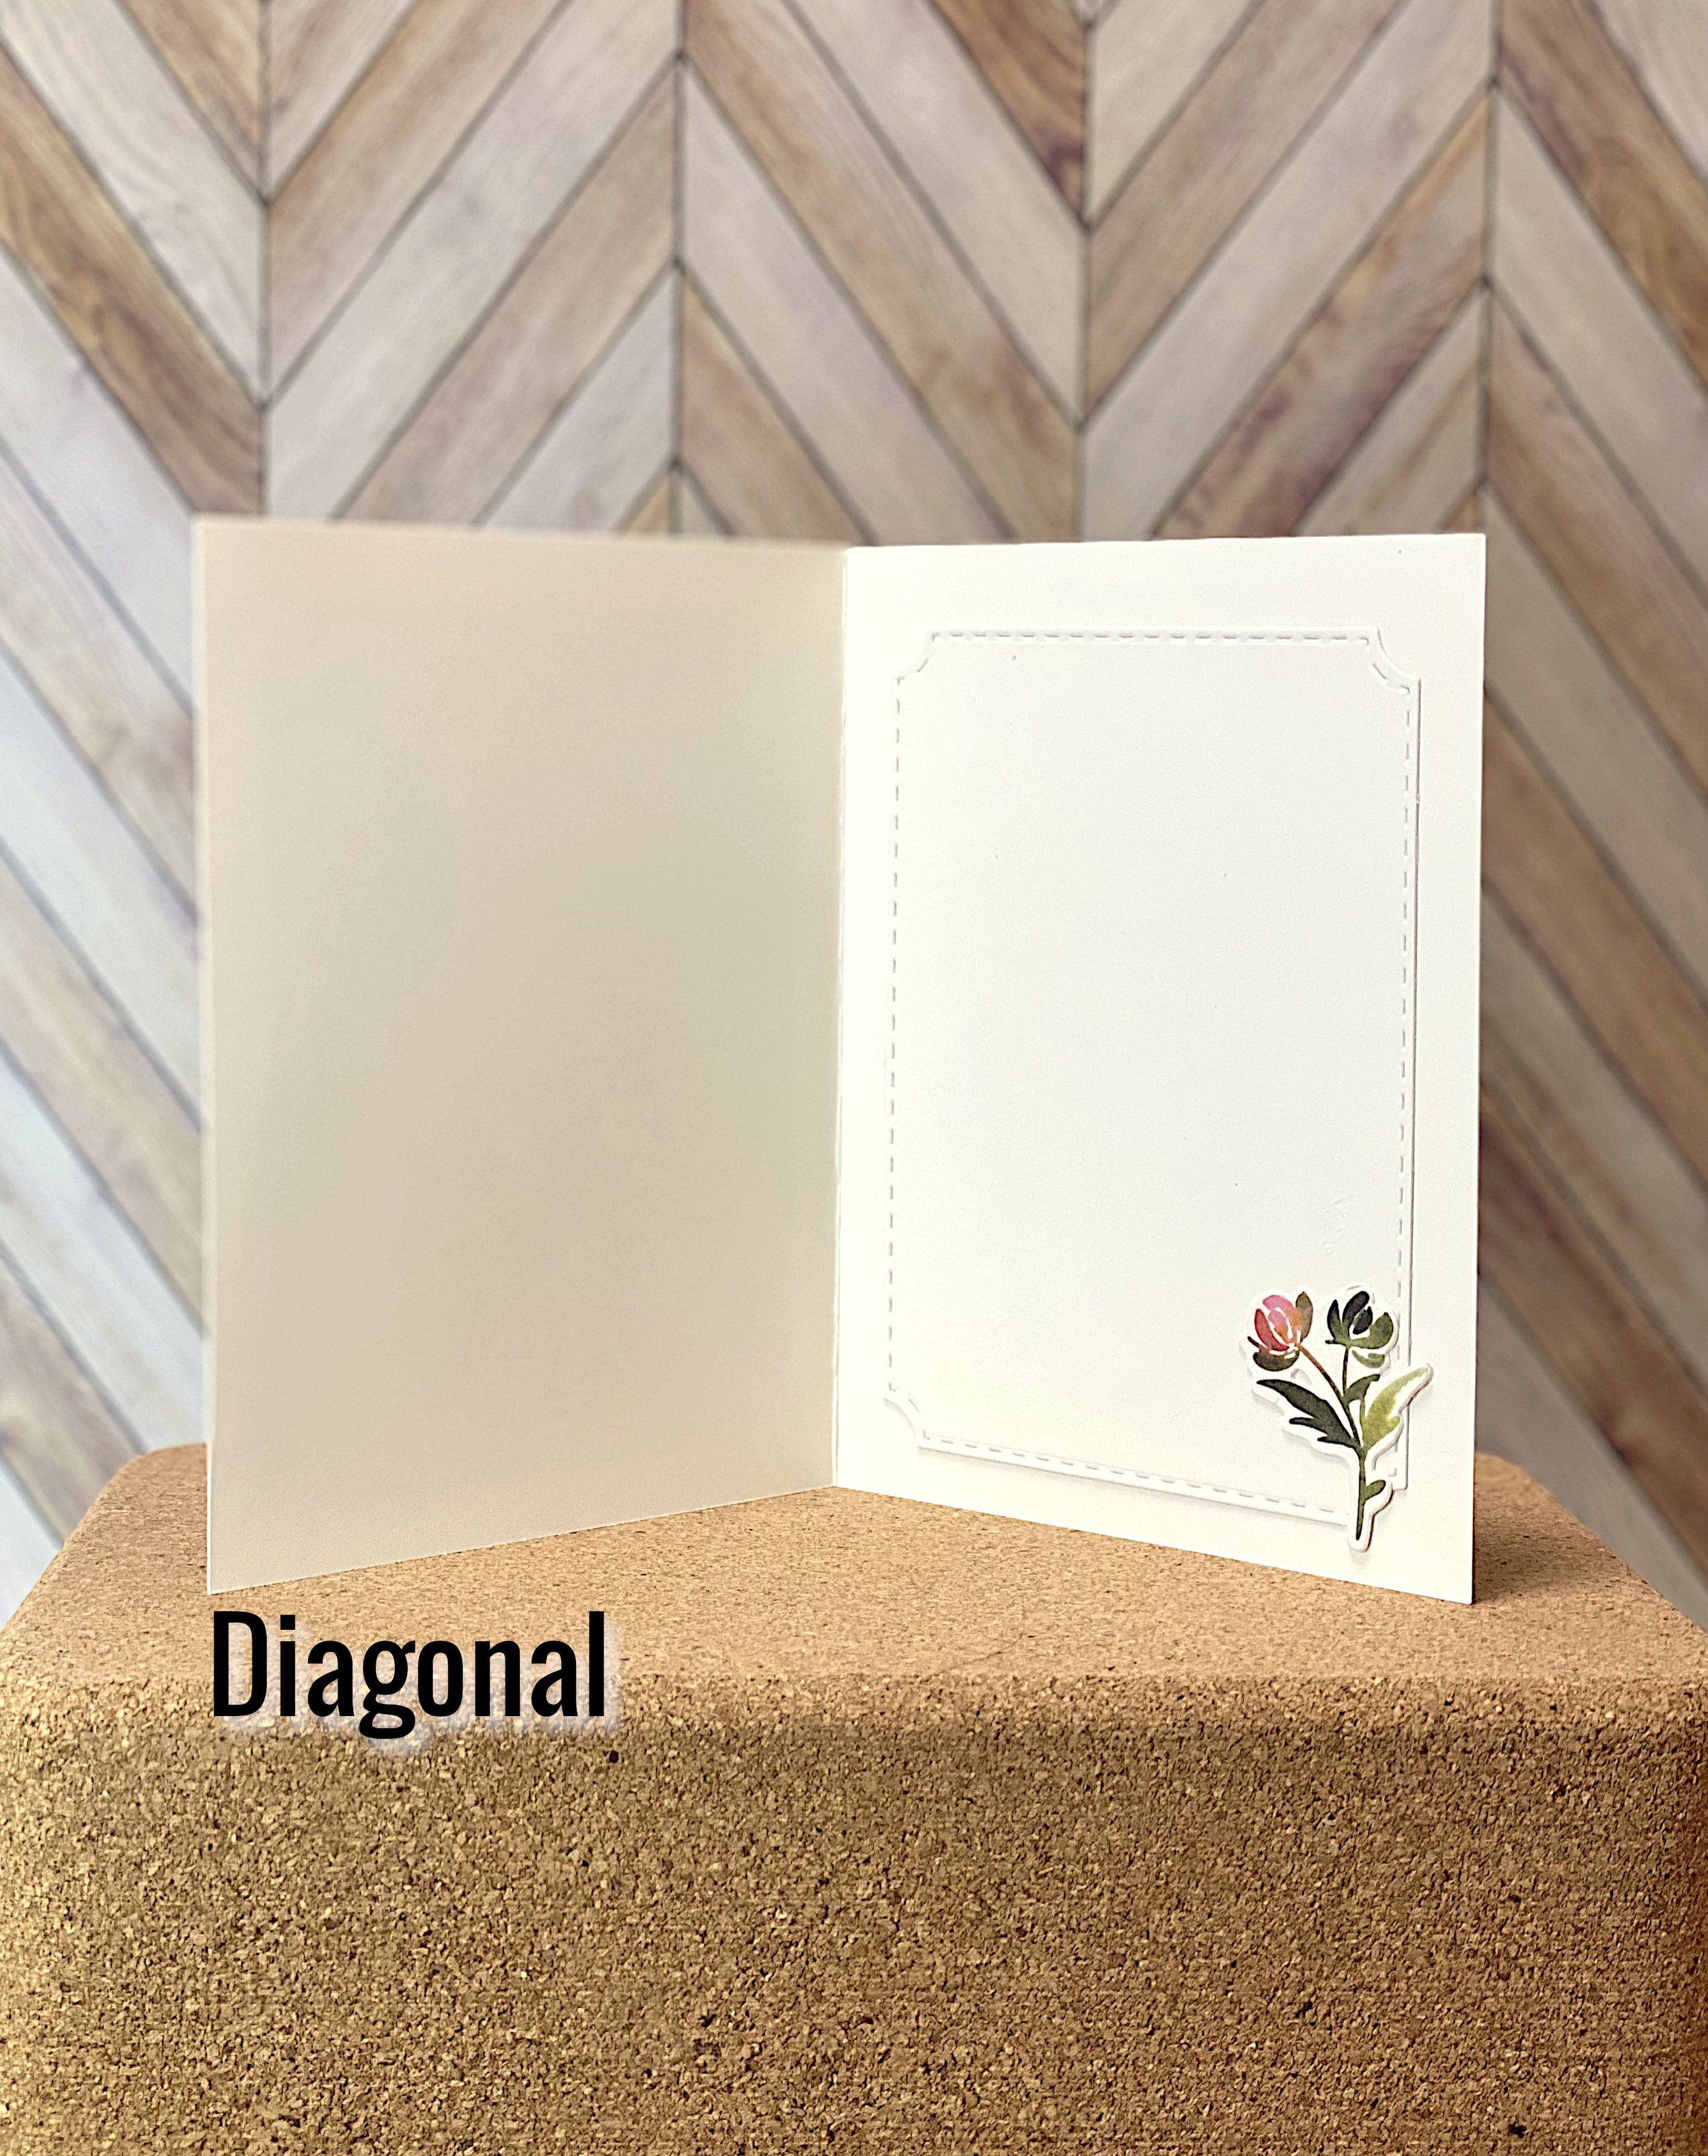
Inside
When I had put together the cards, I had some small flowers left over. Rather than have them go to waste, I used them to decorate the insides. I like the way adding a small element from the front of the card to the inside ties it together. These flowers are so small, that there is still plenty of room for the sender to write their personal message.