
This blog post is based on the weeklong class called Extraordinary Embossing Folders at OnlineCardClasses.com. You can sign up for the class whenever you like. It was originally held in May 2024.

Day 1
The first day was about diffusers and double embossing. The videos were by Kristina Werner and Mindy Eggen. I concentrated on Mindy’s class.
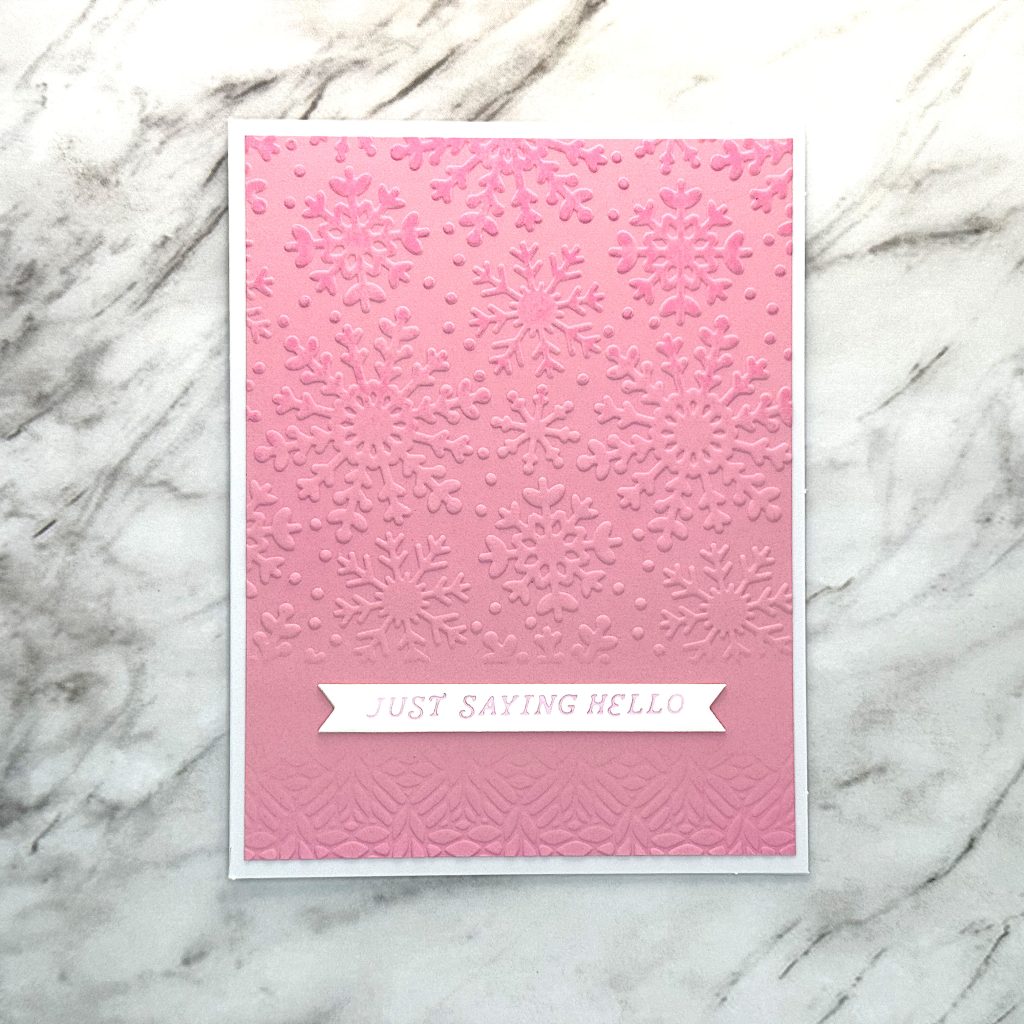
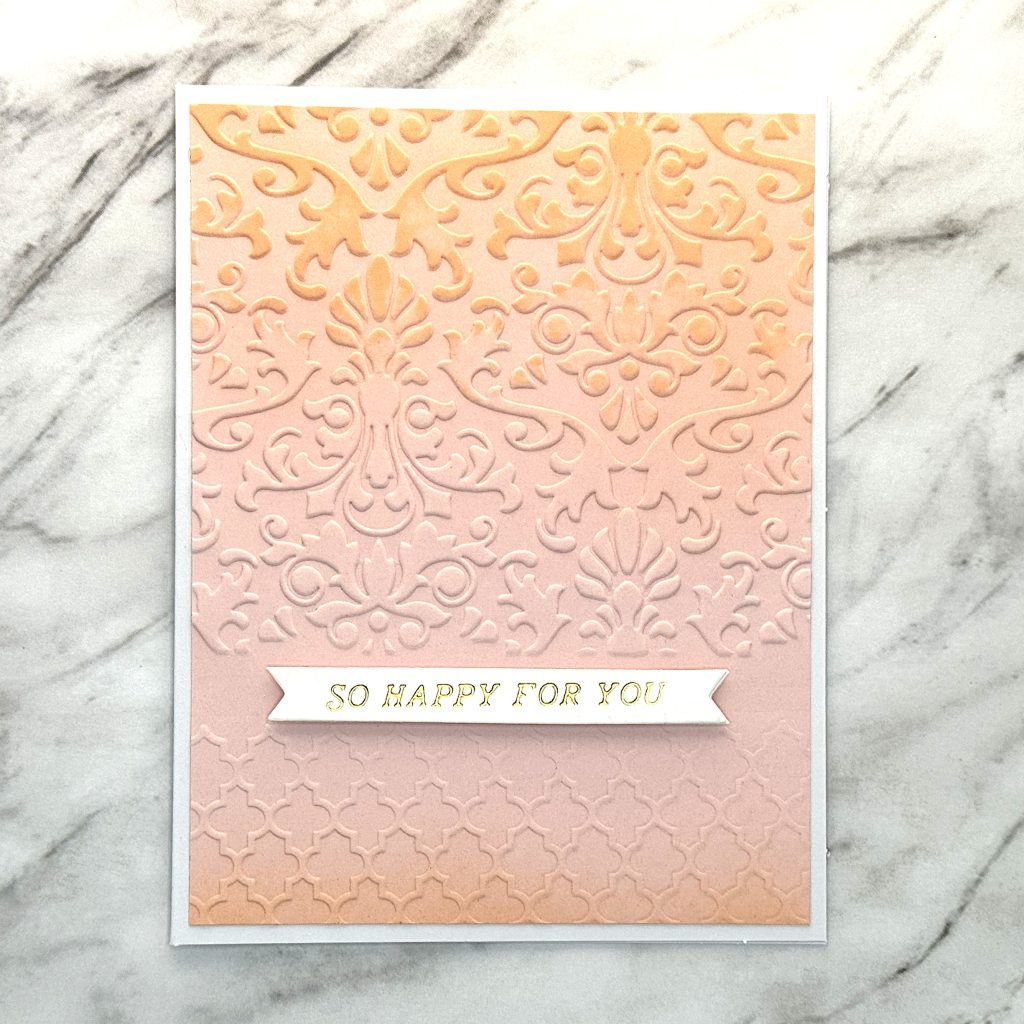
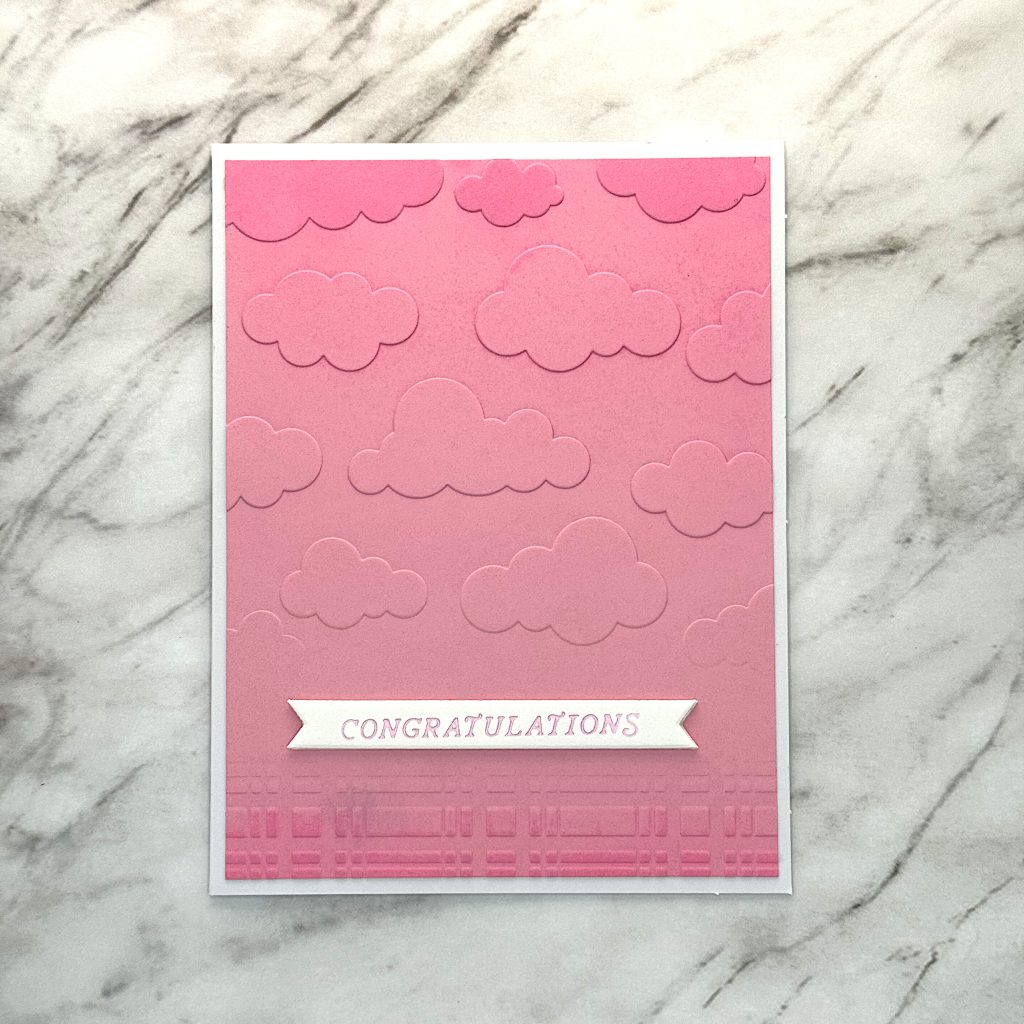
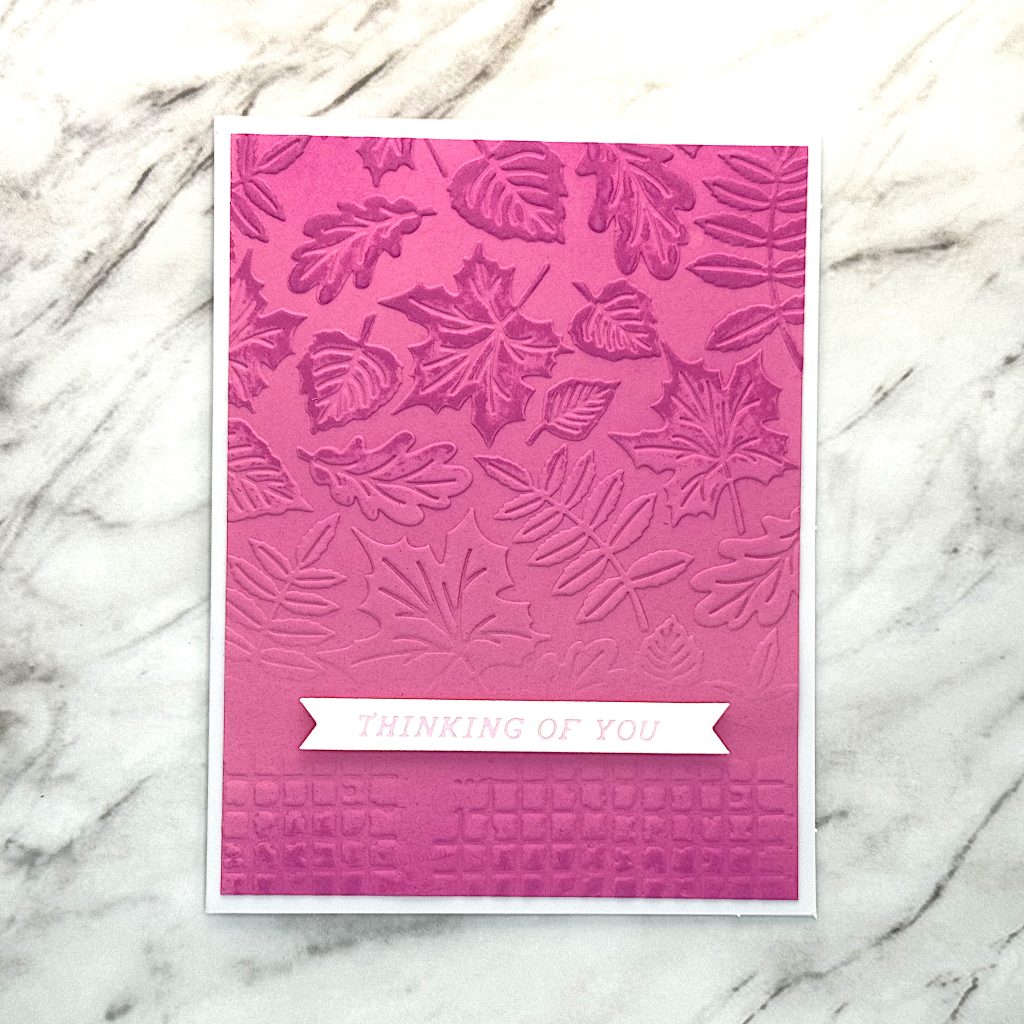
Mindy did partial embossing. First she embossed the upper part of the card panel with one folder, then she did the bottom part with another. She left a narrow strip unembossed, so she could stamp her sentiment there. She also ink blended after embossing. As you can see, I used foiled sentiments instead. I have a jar of foiled sentiments on my desk for just this kind of situation.
Supplies
- Recollections 110 lbs Ballerina
- Recollections 110 lbs Rose Petals
- Darice Damask 2D Folder
- Recollections Morrocan 2D Folder
- Spellbinders Head in the Clouds 2D Folder
- Spellbinders Plaid Company 2D Folder
- Carta Bella Jolly Snowflakes 2D Folder
- Spellbinders Sweater Weather 2D Folder
- Spellbinders Falling Leaves 2D Folders
- Sizzix Tim Holtz Alterations Torn Mesh?
- Spellbinders All You Need Sentiments
Day 2
On day 2 Jennifer McGuire and Jaycee Gaspar were up.
Jennifer applied ink to the insides of her embossing folders. A great trick she shared was to apply a little tape runner to the back of your cardstock before putting it inside the folder. That way you can ink up the folder and emboss it multiple times without the cardstock shifting. I was able to get a more even application of the same ink by applying it several times.
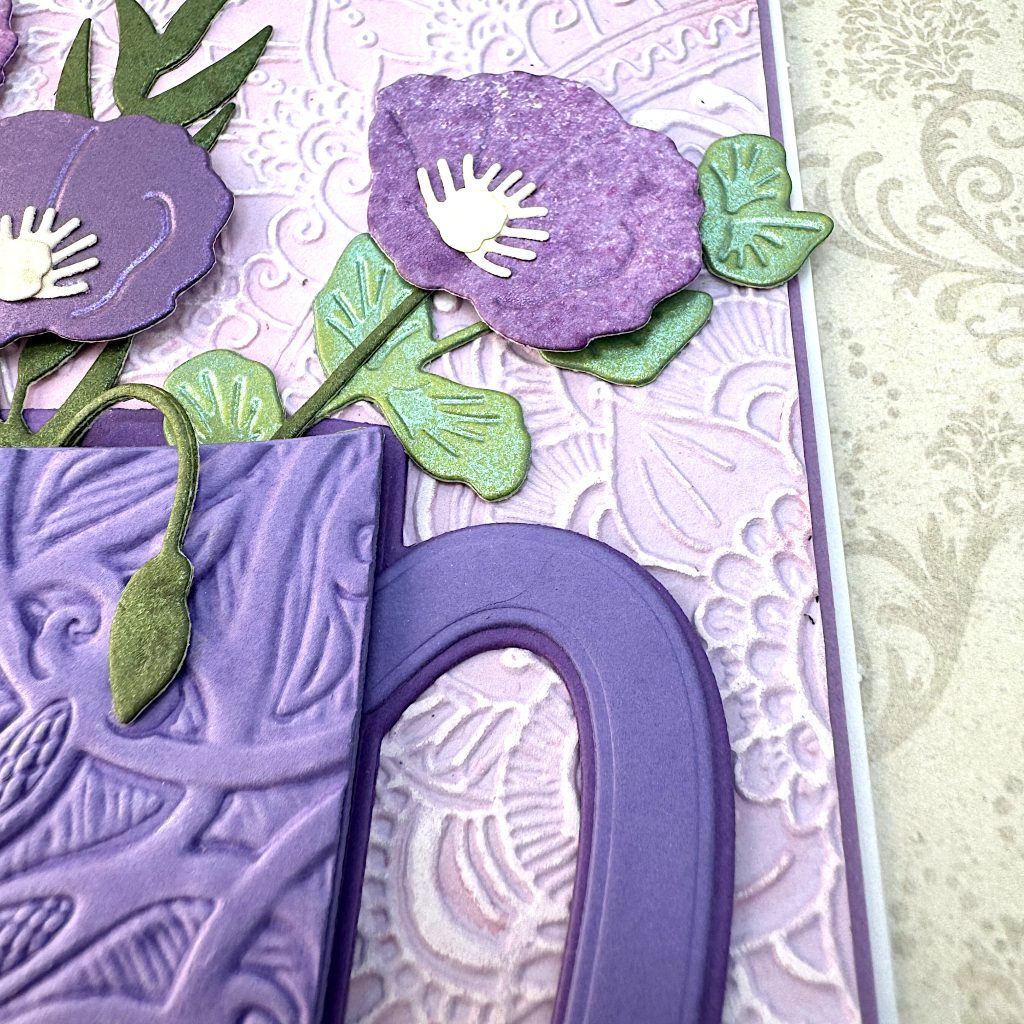
Jaycee took the inking techniques up a notch. I liked his gradient technique. He also showed a gorgeous spotlight technique for use with embossing folders that have coordinating stencils. Here are the cards I created based on Jaycee’s techniques.
Supplies
- Recollections 110 lbs Rose Petals
- Recollections 110 lbs Very Violet
- Tim Holtz Sizzix Botanical 3D Folder
- Jess Scott Sizzix Half Mandala 3D Folder
- Eileen Hull Sizzix Crochet Mandala 3D Folder
- Spellbinders Plaid Company 2D Folder
Day 3
Laura Bassen and Yana Smakula shared their cards on day 3.
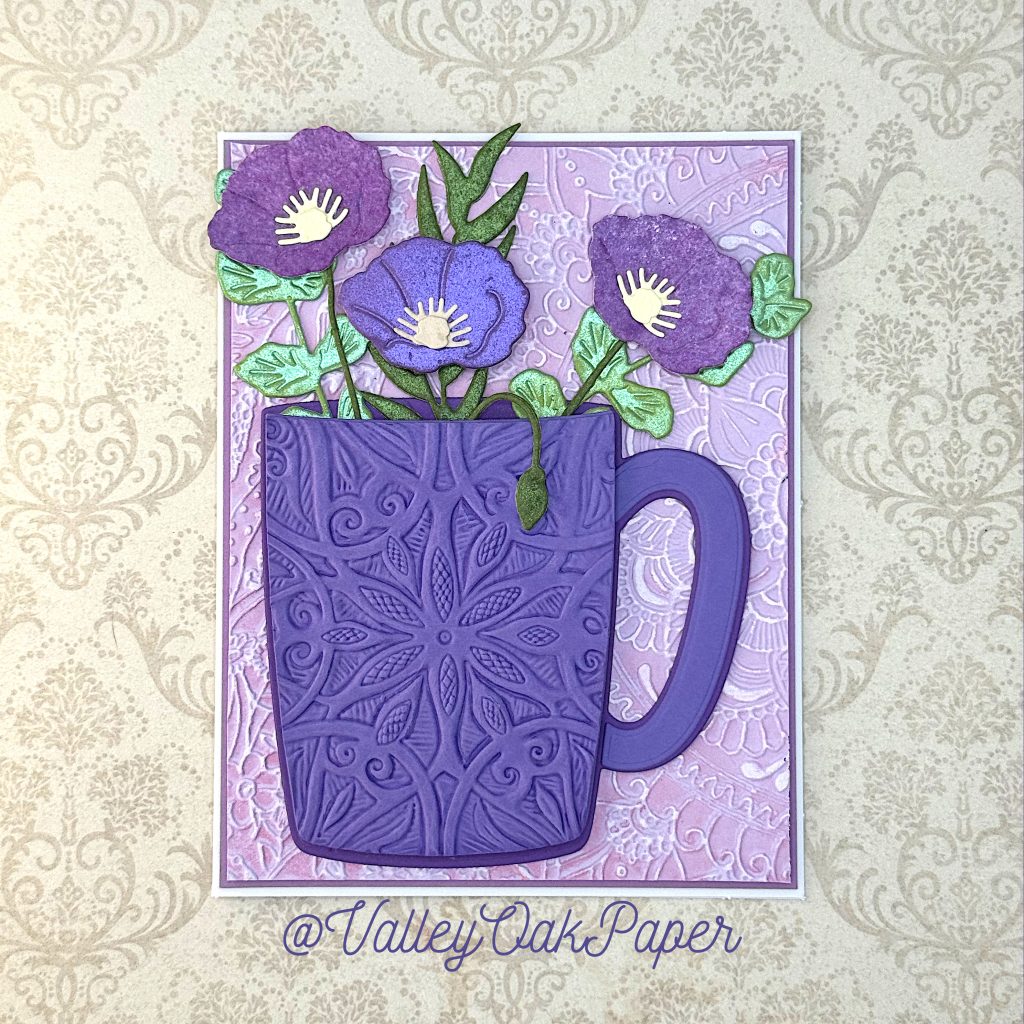
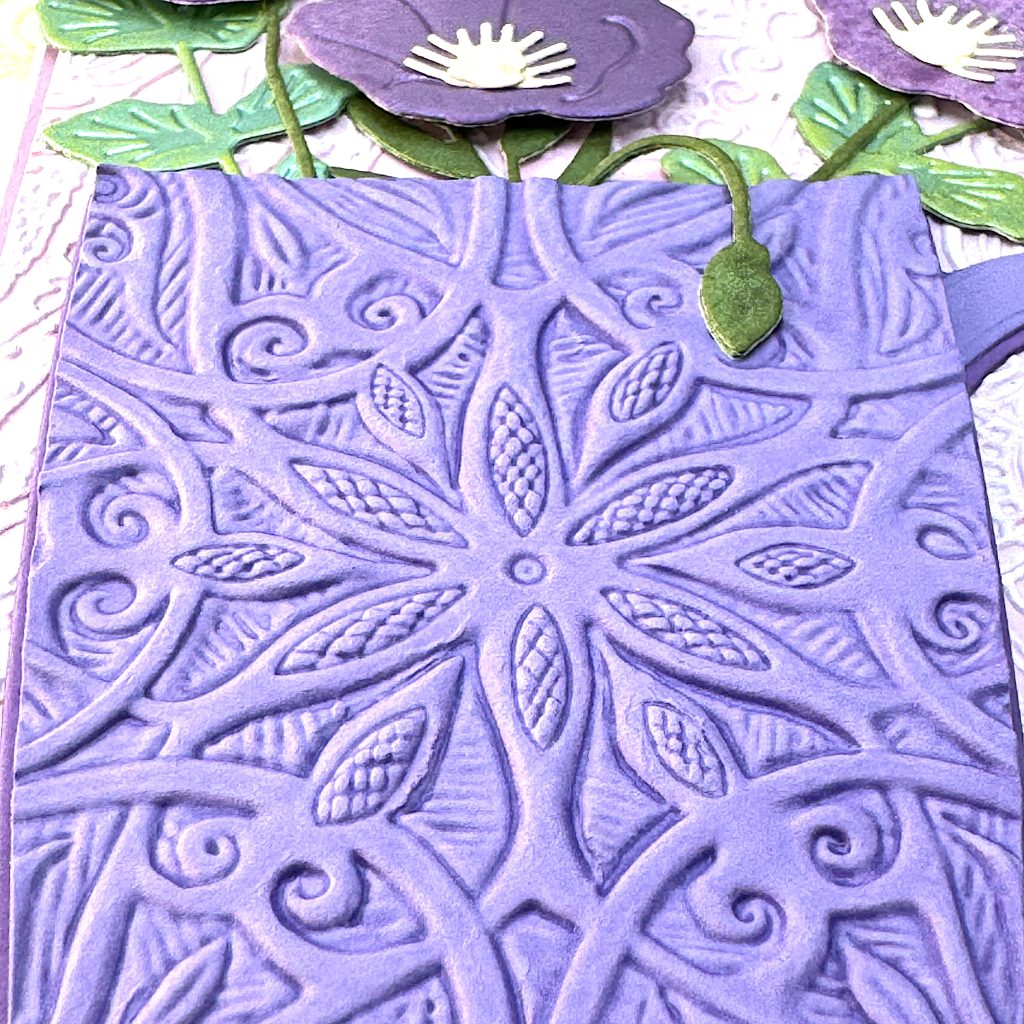
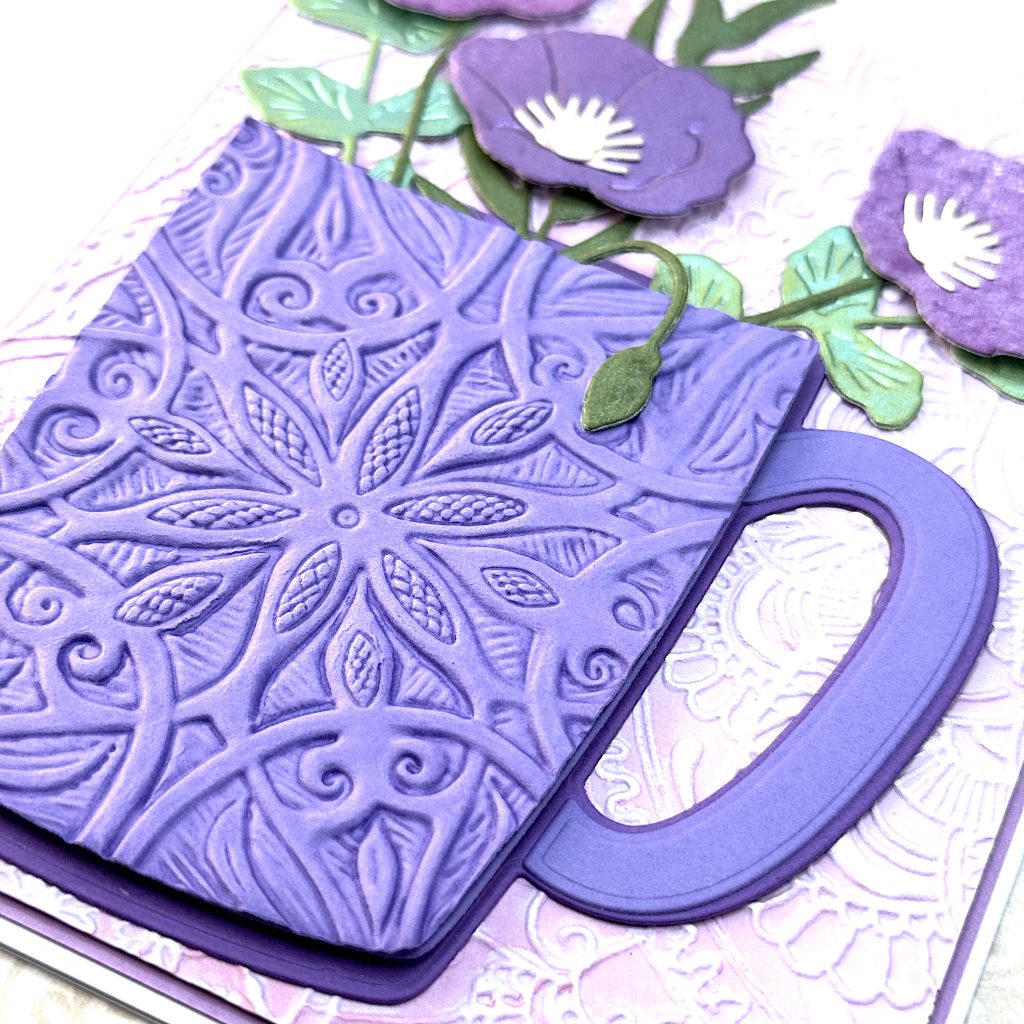
Laura created a shaker card with an embossing folder that creates a pattern and has a coordinating die. I don’t have a folder like that, so I couldn’t try it. But Yana die cut various shapes and then embossed them. She did it to a mug, the sweater belonging to a critter and a present.
Yana’s technique worked great with the Trinity Stamps Beary Cute Layered Mug Die Set. I placed my mug on a background I made on Day 2 and added flowers die cut from cardstock sprayed with Distress Mica Spray Stains.
Supplies
- Recollections 110 lbs Very Violet
- Jess Scott Sizzix Half Mandala 3D Folder
- Trinity Stamps Beary Cute Layered Mug Die Set
- Lisa Jones Sizzix Wild Blooms #2
- Tim Holtz Sizzix Engraved 3D Folder
- Distress Mica Spray Stains


Day 4
On day 4 the instructors were Cathy Zielske and Dana Joy.
Cathy ink blended a panel of cardstock and embossed it with two different embossing folders. Then she sanded off the peaks to reveal the white cardstock under the ink blending.
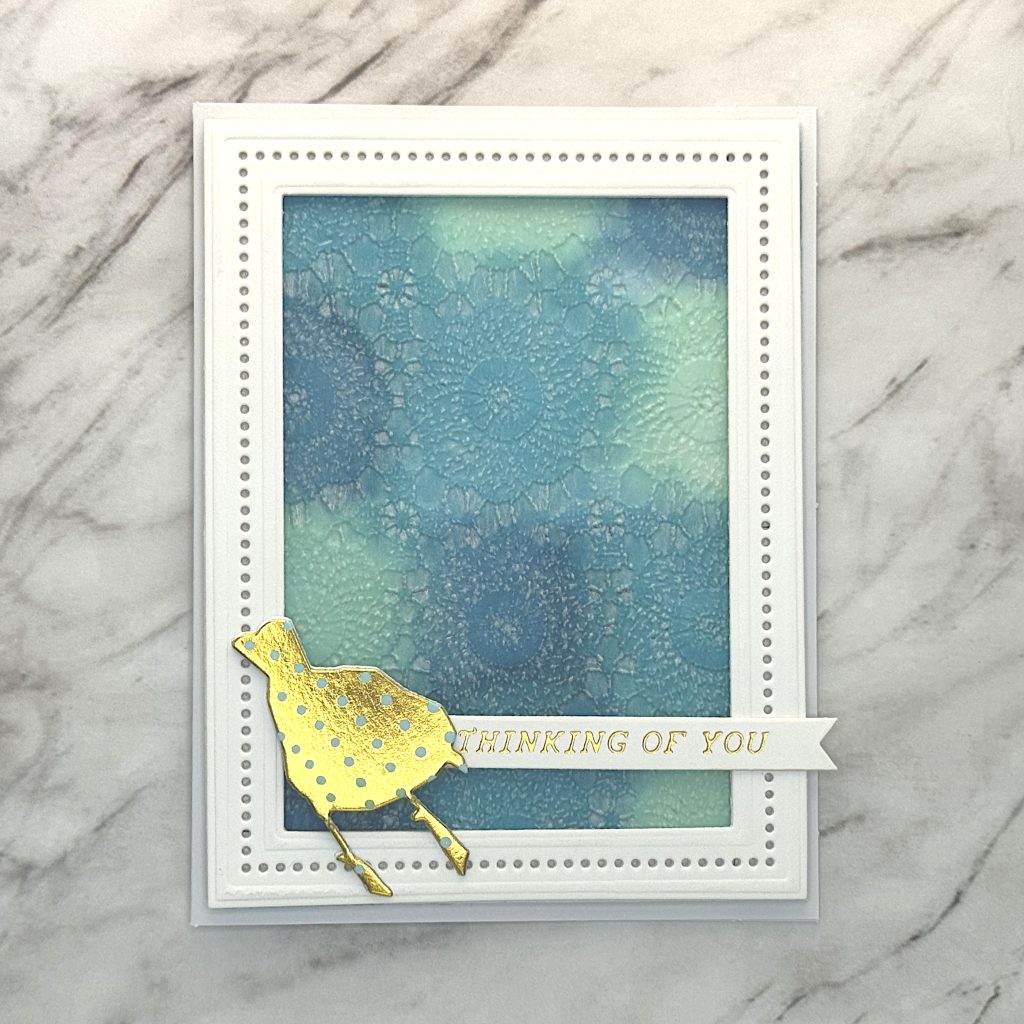
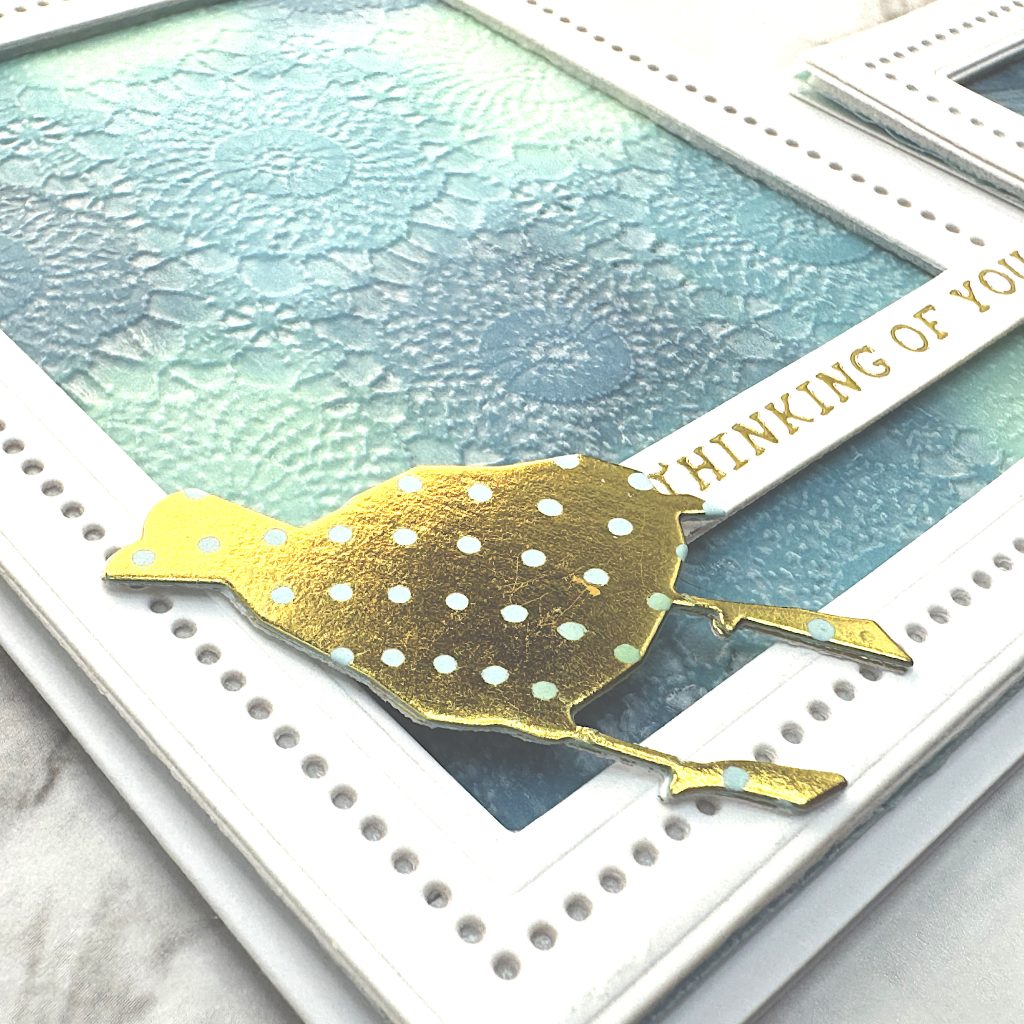
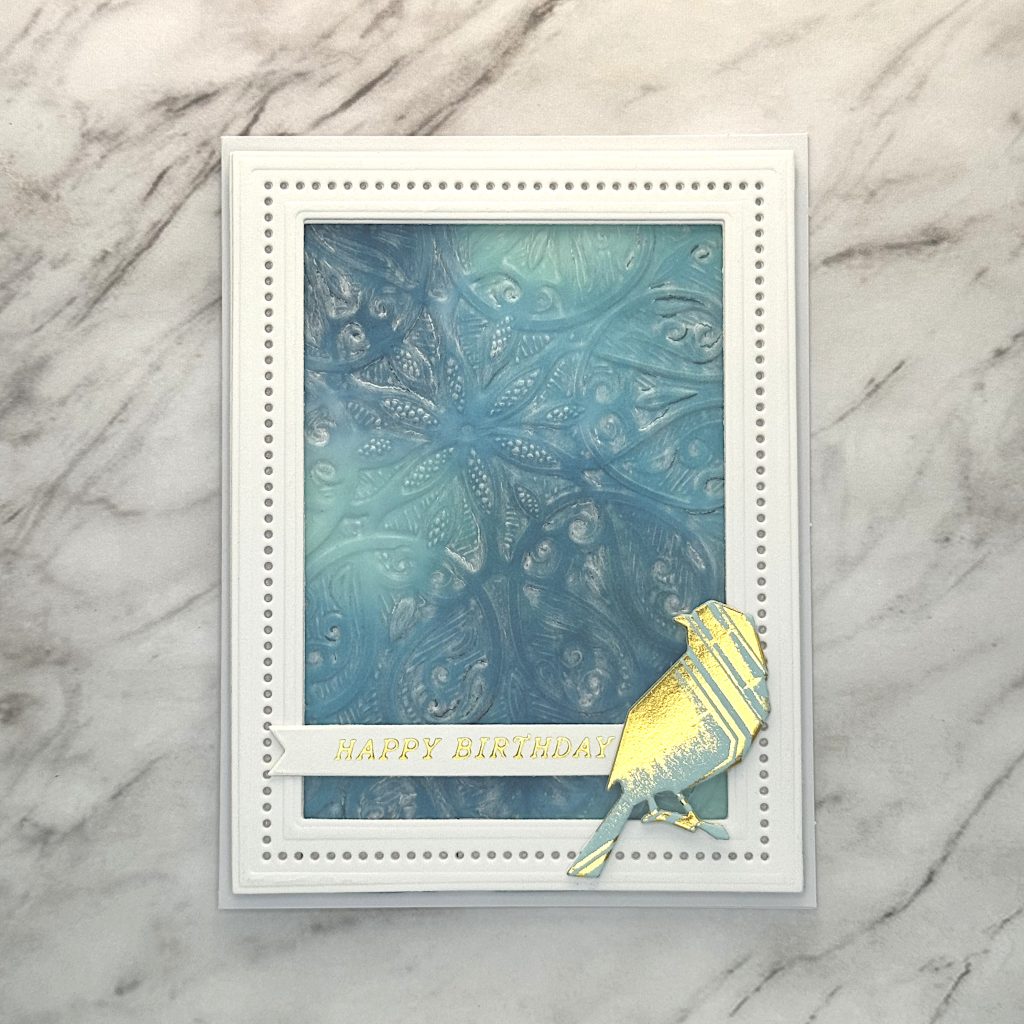
Dana embossed both vellum and acetate. She ink blended on the back of her vellum and used a frame to disguise how she attached the vellum to the card.
I tried Dana’s technique on vellum with Distress Oxides in Salvaged Patina, Uncharted Mariner and Peacock Feathers. The effect looks a bit like frosted glass. I really like it!
But I need to figure out how to emboss on vellum without getting tears. I used Dana’s trick of including a piece of cardstock inside the embossing folder, but I still got some tears. I wonder if using thicker cardstock would help. 🤔
If the bird die cuts I applied to my vellum cards look familiar, it’s because I shared how I created them back in January.
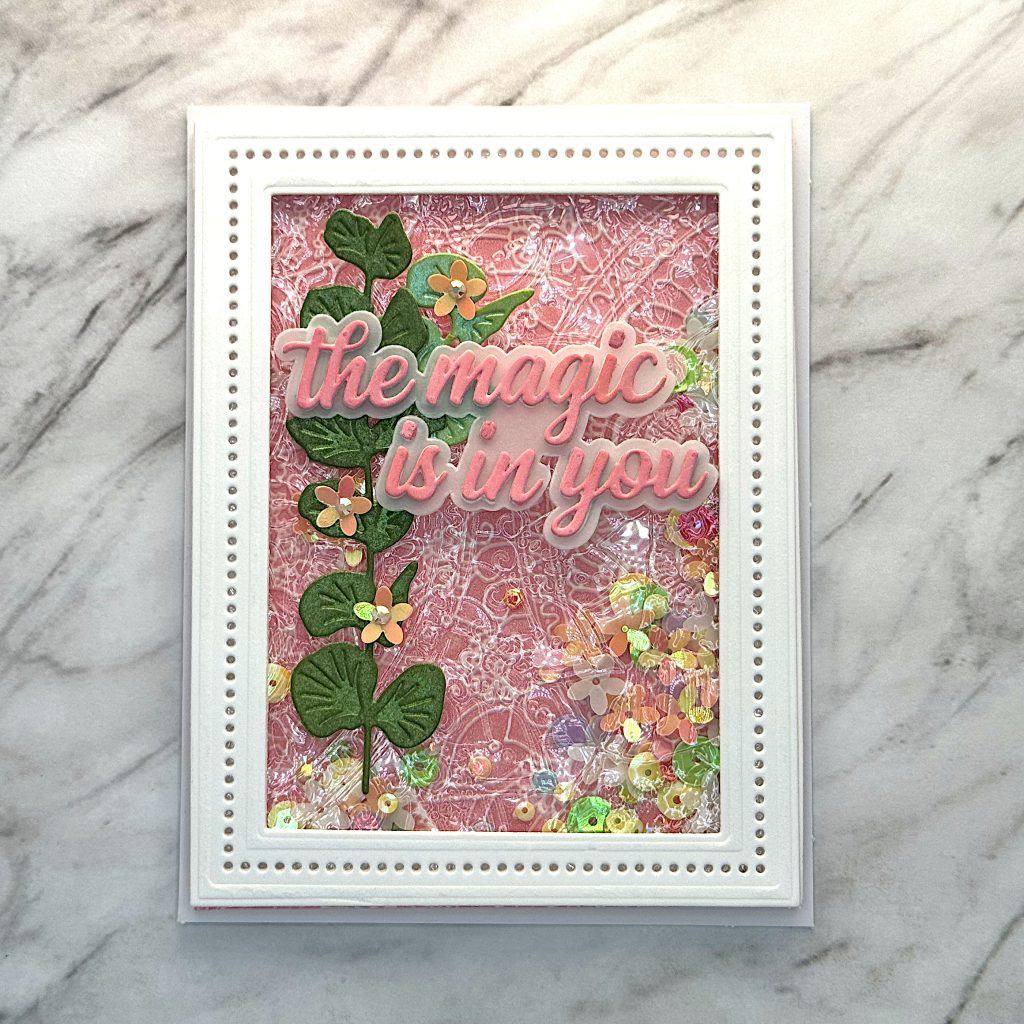

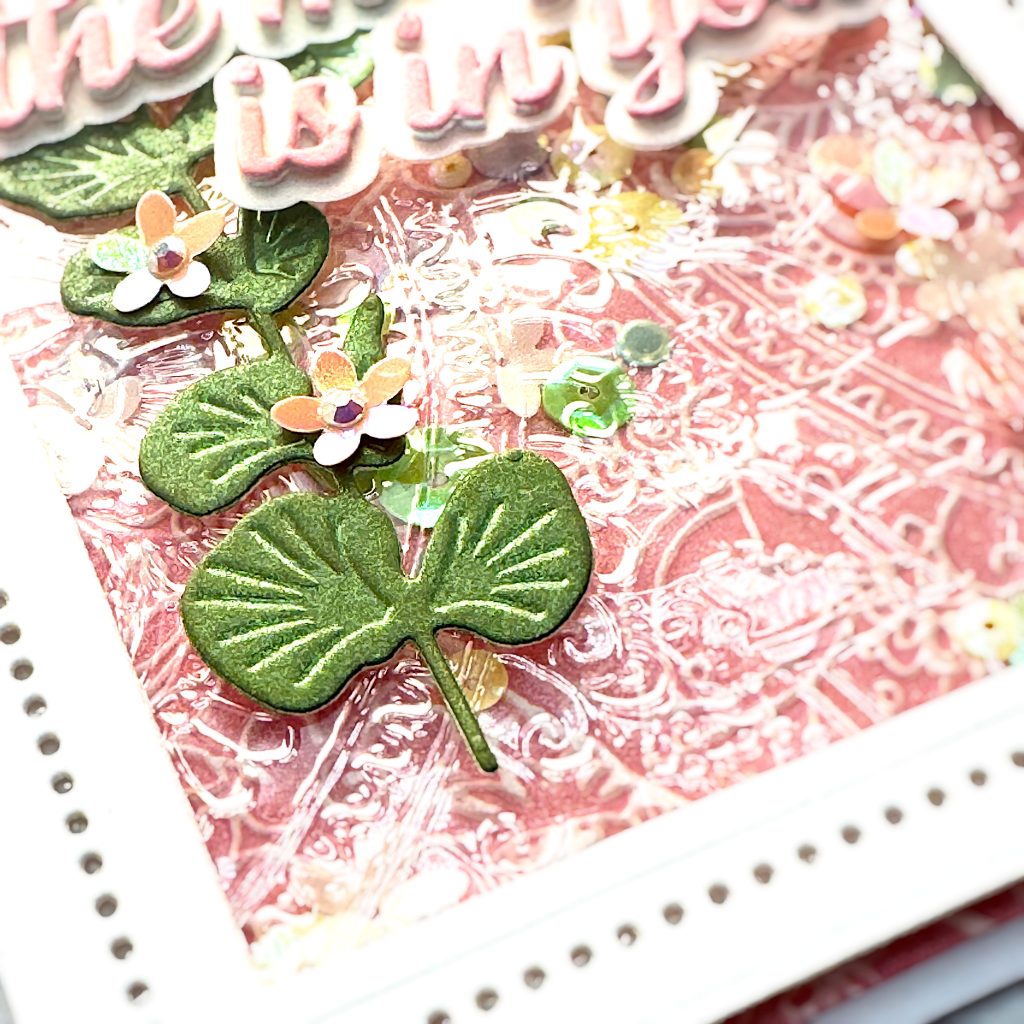
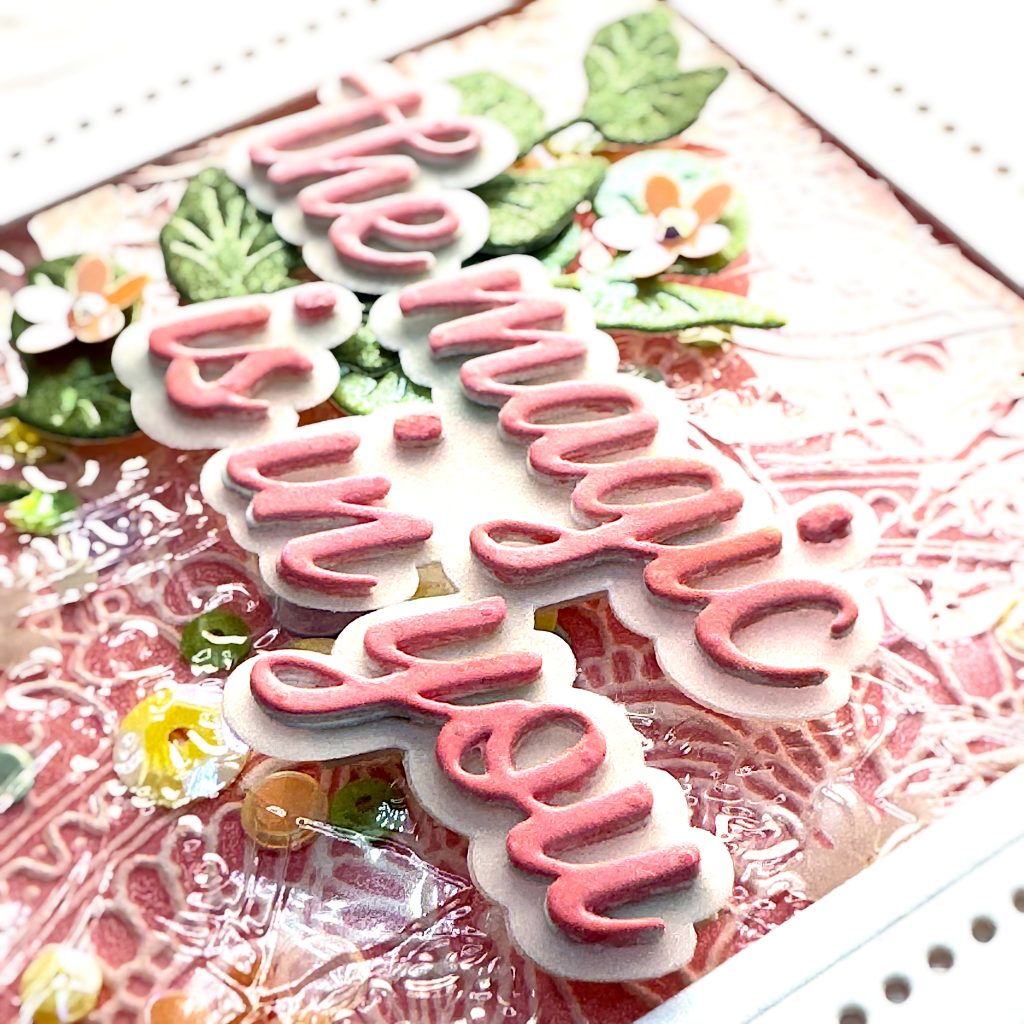
Embossed Shaker Card
For this shaker card, I actually used a background I created back on Day 2. Then I used the same embossing folder on the acetate. That worked great — no tears!
I tested aligning the acetate impression with the background, but I felt it looked better with it reversed. The sequins I used were a freebie from Studio Katia. The magical sentiment is by Pinkfresh. I colored it with Abandoned Coral Distress Oxide because that’s what I had used for the background.
Supplies
- Vellum
- Heat-resistant acetate
- Tim Holtz Sizzix Engraved 3D Folder
- Eileen Hull Sizzix Crochet Mandala 3D Folder
- Tim Holtz Sizzix Silhouette Birds Die Set
- Spellbinders Essential Rectangles
- Spellbinders All You Need Sentiments
- Lisa Jones Wild Blooms 2
- Pinkfresh The Magic Is In You
Day 5
Jennifer
Jennifer made cards with a gel plate. She smoothed out ink on the gel plate with her brayer. Then she pressed one side of an embossing folder onto the gel plate to remove ink from the raised areas. She pulled a print from the gel plate and ran the inked folder through her die cutting machine with a piece of cardstock inside. So this is a two-for-one technique.
One thing that’s always bothered me with using my gel plate with inks, is that the inks bead up on the surface. So I tried adding a couple of different mediums to prevent that. Hands down the best thing I tried was Vicky Boutin Acrylic Gel Medium. The medium does dilute the color, but I got around that by using reinkers. You don’t need much of the medium, I found. A dab will do ya.
Kristina
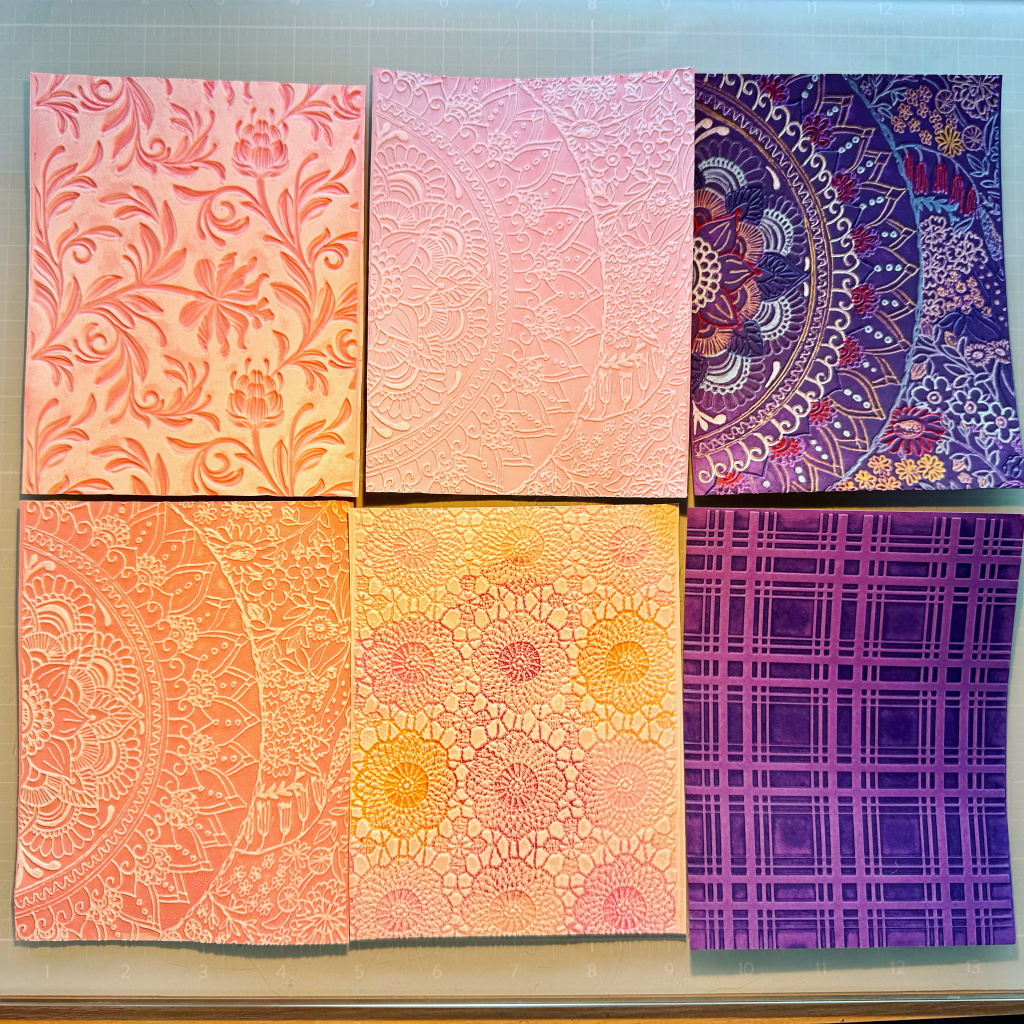
Kristina used watercolors and heat embossing. For some of her backgrounds she applied Versamark to the embossing folder, for others she applied it direct-to-paper after dry embossing. I tried both techniques and the results were stunning!
Kristina used reinkers for watercoloring. I did that too, but I also used Lindy’s Magical Powders. They really shine whenever emboss resist is involved.
Supplies
- Vicky Boutin Acrylic Gel Medium
- Artist’s Loft Watercolor Paper 6 by 9”
- Jess Scott Sizzix Half Mandala 3D Folder
- Tim Holtz Sizzix Botanical 3D Folder
- Tim Holtz Sizzix Engraved 3D Folder
- Eileen Hull Sizzix Crochet Mandala 3D Folder
- Szoka Marko Spellbinders Ski Lodge 3D Folder
- Spellbinders Floral 2D Folder